New Dash Top

Here’s what the dash top looked like when I got 701R:

After lots of glueing and Bondo and sanding and layers of vinyl spray paint, it looked like this:

Pretty dreadful, but I was going to cover it with a dash mat I bought on Ebay:

However, it no longer fitted properly in the car – probably warping and too much material build up when I used the Bondo:

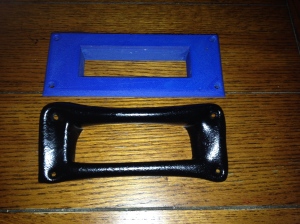
(The dash vent covers are replacements which I 3D-printed in ABS – they are not an exact match of the originals.)

So, I decided to trash the dash, and make one myself – it couldn’t look much worse, could it?!

First I measured and cut a piece of plywood to fit the windscreen edge and overhang the dash by a couple of inches:

Then I cut a 4ft length of wood to the curved shape of the upper edge of the dash, and screwed/glued it to the plywood:

Using 1/2″ thick foam, I cut a piece for the top:

… and pieces for the underside leading edge:

which I then glued in place. Then I covered the whole thing in naugahyde:

and fitted it:

Now to finish the appearance I need some cheeks to fill out these gaps at both sides:

I think this will be a tricky design and print for my 3D printer, but will start experimenting. I’d welcome other suggestions for how to block off those gaps.

Posted in Uncategorized | Tagged , , , | 2 Comments

Brakes

The rear LHS brake line fittings were both frozen in place. The fitting on the RHS drum was also frozen. I ordered new brake shoes, new cylinders Beck Arnley 072-4047 Wheel Cylinder , female flare nuts from Dave Bean, a roll of steel brake tubing complete with a set of 3/16″ male flare fittings, a OTC 4503 Stinger Double Flaring Tool Kit , and armed with my pipe cutter and a pipe bending tool, made up new brake lines for both sides.

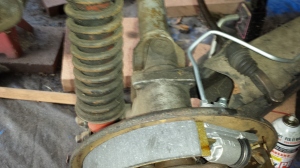
Here’s the LHS – not very pretty, but functional (my tube bending skills need work):16677088545_db9ff3d1c7_o And here is the LHS:

16489679120_a594d40432_o

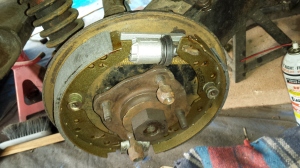
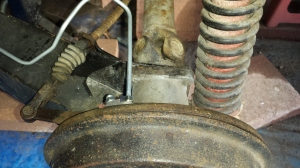
This shows the new brake cylinder and shoes. The trick with putting the shoes on is to assemble them on the ground, with springs attached, and then muscle them into position (rather than try to attach the springs once the shoes are in place).

16677088525_4ca756c7dd_o

There is a problem: the RHS handbrake cable is frozen in the “applied” position, so it is pushing the shoe forward (as can be seen in the above photo). I need to try to free the cable, and am soaking it in WD40.

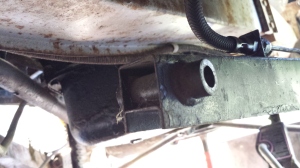
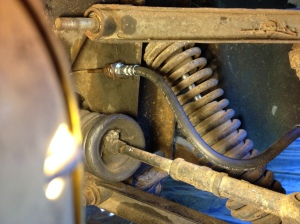
In order to remove the old, and attach the new, brake hose at the LHS, I had to drop the radius arm:

16531788775_069fba6659_o

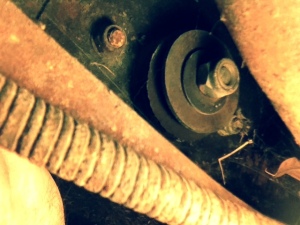
The radius arm is held in position by a long bolt that passes from the outside to the inside of the car, and is secured with a couple of large washers and a nyloc nut:

16281690100_07b5ccb1c0_o

Access is very tight: I had to use a crow’s foot wrench.

Posted in Uncategorized | Tagged , , , , , , | Leave a comment

Pedal Cluster and Accelerator

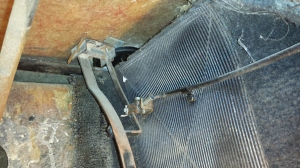
15910615114_5d64d81b2e_o

The accelerator pedal is attached to the underside of the dash area, as shown above. The cable is attached to the pedal with a clamp and a clevis pin secured by a cotter pin.

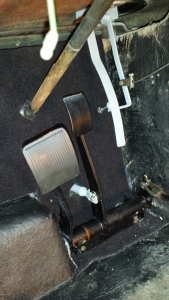
16057150113_93a5eb1f0a_o

The pedal cluster is held to the footwell by four bolts that screw into captive nuts on the cluster. One of these nuts stripped when I was removing it. After cleaning, painting and lubing, it was reattached as show above, using a new bolt and nyloc nut for the missing nut. The brake pedal is attached to the pushrod using a clevis pin and cotter pin. The clutch pedal activates an arm at its opposite side on the cluster, which is attached to the clutch cable using the obligatory clevis/cotter pin arrangement.

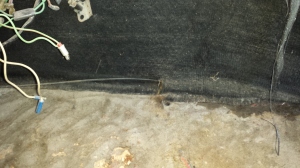
16344307020_7e6b1a5882_o

The above photo shows how the clutch cable emerges from behind the tunnel carpet.

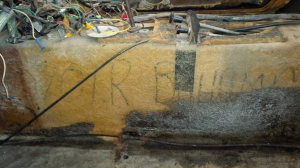
16346912419_27889693ff_o

With the carpet removed, the clutch and accelerator cables are more clearly visible. Notice the chassis number and original colour written on the tunnel: “701R BAHAMA”.

Posted in Uncategorized | Tagged , , , , , | Leave a comment

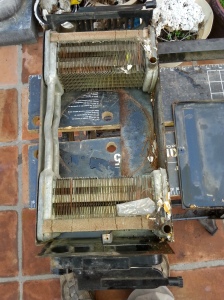
Refurbishing the Heater Box

12375079953_e078e194a6_o

The heater box during disassembly. The finned heat transfer parts are fed from hoses that are attached to the two pipes that emerge at the top of the tunnel in the passenger compartment. This pipes originate in the engine compartment, and are themselves attached via hoses to the water pump.12375362094_b30ca209d5_o

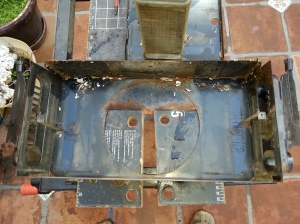
Above is a photo of the box with the water unit removed.

After cleaning, painting and re-installation:

14132429886_b692e9d6bd_o

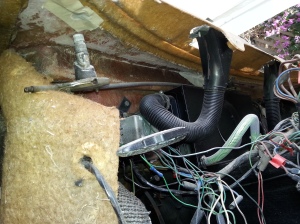
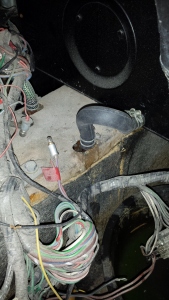
The clear hose (green antifreeze visible) is 1/2″ reinforced plastic designed for hot liquids – it’s handy for checking whether there is any flow to the heater! On the other side, I found a Dayco 87310 Small Id Hose (trimmed by a couple of inches) was a great fit to the very tight bend needed:

16703211696_1a5eaf71e0_o

Posted in Uncategorized | Tagged , | Leave a comment

Refurbishing the Radiator Fan

12279229934_3ba8627bb6_o

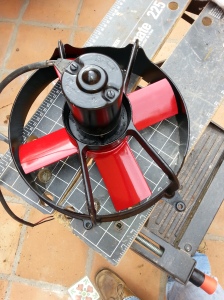
Here is the radiator fan after disassembly, lubrication, paint, and reassembly. The fan blades are attached by a left hand thread nut – easy to shear the threaded shaft if you think it’s a standard thread and try to loosen it!

Posted in Uncategorized | Tagged | Leave a comment

Reverse Lamp Switch

11938169405_19b24c1b02_o

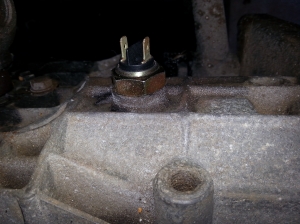
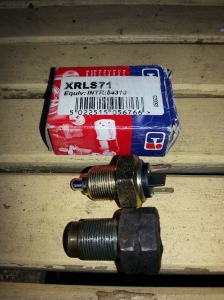
The existing switch was broken. This is a replacement, installed in the transmission. Here is a photo of the new part (XRLS71) against the old:

11938184635_4cc6d6137c_o

Posted in reverse lamp switch | Leave a comment

New Mechanical Fuel Pump and Oil Filter

11919553233_459ff10eb1_o

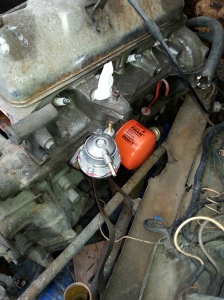
The PO had a dubious electric fuel pump setup, with wires dangling around. I removed that, and installed a new mechanical pump. Also shown in the photo is a new oil filter – I removed the oil cooler system the PO had in place, which involved removing the two oil hoses that were routed to the front of the car via the tunnel,  removing the attachment to the engine block’s oil galley, and the removing the cooler in the front driver side wheel well.

Posted in Uncategorized | Tagged , | Leave a comment

3D Printing Replacement Dash Vents

15433702823_467e0cb7ea_o

The dash vents are sun warped and pretty much useless. I designed replacements, of approximately the same style, using Tinkercad, and printed a prototype in blue ABS (shown above) on my Prusa i3 3D printer. After some adjustments to the 3D model of the screw hole positions, I printed a pair in black ABS.

The STL file is available on Thingiverse 

Posted in Uncategorized | Tagged , , , | Leave a comment

Preparing the Interior Engine Firewall for Carpet

15745862814_25b9baeaf4_o

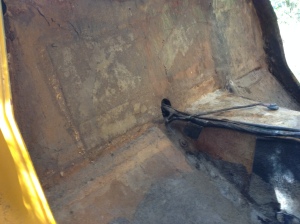
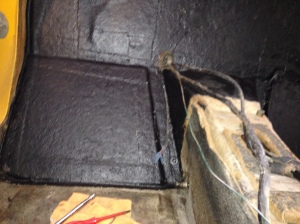
The firewall is not pretty, and I patched a few areas with fibreglass, especially behind the driver’s seat. The firewall will be covered in carpet, so its appearance is not important, but I gave it a coat of Rustoleum Flat Black, so that the surface was smoother and the carpet adhesive would hopefully work better.

16180920590_af72752f69_o

Posted in Uncategorized | Tagged , | Leave a comment

Front Brakes

16368295925_04c25fc143_o

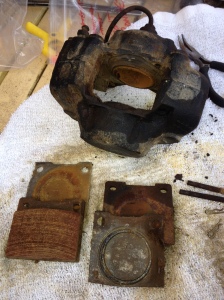
Replacing the ancient hoses and pads on the front brakes. Two 5/16″ spanners are required. Hoses are new, from R.D. Dent. (While doing this job I noticed that the steering rack boots need replacing.)

16135682047_c9cbce1372_o

There are two sheets of card/rubber: one behind each pad. These were well worn, and I tossed them. Probably something to prevent squeal. I replaced the pads with new Ferodo.

Posted in Uncategorized | Tagged , | Leave a comment